Sign In
Upload
Manuals
Brands
NEC Manuals
Flat Panel TV
50XR4
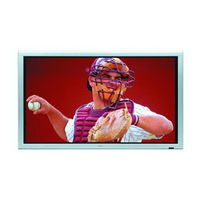
User Manuals: NEC 50XR4 Plasma TV Display
Manuals and User Guides for NEC 50XR4 Plasma TV Display. We have
7
NEC 50XR4 Plasma TV Display manuals available for free PDF download: User Manual, Operation Manual, Supplementary Manual, Installation Manual, Brochure, Specifications
NEC 50XR4 User Manual (111 pages)
User Guide
Brand:
NEC
| Category:
Monitor
| Size: 1.39 MB
Table of Contents
Table of Contents
13
Important Information
4
Specifications
6
Supported Resolution
7
Table of Signals Supported
7
Installation
14
Ventilation Requirements for Enclosure Mounting
14
How to Use the Safety Metal Fittings and the Screws for Safety Metal Fittings
14
Cable Management
15
How to Use the Remote Control
15
Battery Installation and Replacement
15
Handling the Remote Control
15
Operating Range
15
Part Names and Function
16
Front View
16
Rear View/ Terminal Board
17
Remote Control
18
Basic Operations
19
Power
19
To Turn the Unit on and off
19
Volume
19
To Adjust the Sound Volume
19
Mute
19
To Mute the Audio
19
Display
19
To Check the Settings
19
Digital Zoom
19
WIDE Operations
20
Wide Screen Operation (Manual)
20
When Viewing Videos or Digital Video Discs
20
Wide Screen Operation with Computer Signals
21
SPLIT SCREEN Operations
22
Showing a Couple of Pictures on the Screen at the same Time
22
Operations in the Side-By-Side Mode
22
Adjusting the OSM Controls
23
Operations in the Picture-In-Picture Mode
23
Selecting the Input Signals to be Displayed
23
Zooming up Pictures
23
OSM (on Screen Menu) Controls
24
Menu Operations
24
Menu Tree
25
Picture Settings Menu
27
Adjusting the Picture
27
Reducing Noise in the Picture
27
Storing Picture Settings
27
Adjusting the Color to the Desired Level
28
Changing the Gamma Curve
28
Making the Low Tone Adjustments
28
Setting the Color Temperature
28
Adjusting the Colors
29
Adjusting the Pedestal Level (Black Level)
29
Setting the Picture Mode According to the Brightness of the Room
29
Setting the Picture to Suit the Movie
29
Audio Settings Menu
30
Adjusting the Treble, Bass and Left/Right Balance and Audio Input Select
30
Setting the Allocation of the Audio Connectors
30
Image Adjust Settings Menu
30
Adjusting the Position, Size, Fine Picture, Picture Adj
30
SET up Settings Menu
31
Checking the Signal Being Transmitted to RGB1 Terminal
31
Setting a Computer Image to the Correct RGB Select Screen
31
Setting High Definition Images to the Suitable Screen Size
31
Setting the BNC Connectors
31
Setting the Language for the Menus
31
Input
32
Setting the Background Color When no Signal Is Being
32
Setting the Signal and Black Level for DVI Signal
32
Setting the Video Signal Format
32
Resetting to the Default Values
33
Setting the Gray Level for the Sides of the Screen
33
Setting the Position of the Menu
33
Setting the Screen Size for S1/S2 Video Input
33
Turning On/Off the Menu Display
33
Erasing the Sub Screen Image When There Is no Input
34
Function Settings Menu
34
POWER/STANDBY Indicator
34
Setting the Input Skip
34
Setting the Power Management for Computer Images
34
Signal
34
Displaying Still Images in the Sub Screen
35
Displaying the Entire Image During DIGITAL ZOOM Operations
35
Reducing Burn-In of the Screen
35
Checking the Frequencies, Polarities of Input Signals, and Resolution
37
Reducing the Brightness of Closed Caption
37
Setting Closed Caption
37
Signal Information Menu
37
External Control
38
Application
38
Connections
38
Communication Parameters
38
External Control Codes (Reference)
38
Type of Connector: D-Sub 9-Pin Male
38
Pin Assignments
38
Mini D-Sub 15-Pin Connector (Analog)
38
DVI-D 24-Pin Connector (Digital)
38
Troubleshooting
39
Limited Warranty
43
Hdmi-DVI Cable/Contents will Differ According to the Model
51
Contents will Differ According to the Model
51
HDMI-DVI Cable
51
Installation
52
(Optional). Fasten the Safety Fittings to the Holes in the Back of the Monitor Using the Safety Fitting Mount Screws
52
How to Use the Safety Metal Fittings and the Screws for Safety Metal Fittings
52
Tipping Due to External Shock When Using the Stand
52
Ventilation Requirements for Enclosure Mounting
52
Cable Management
53
How to Use the Remote Control
53
Battery Installation and Replacement
53
Handling the Remote Control
53
Operating Range
53
Part Names and Function
54
Front View
54
Rear View/ Terminal Board
55
Remote Control
56
Basic Operations
57
Power
57
To Turn the Unit on and off
57
Volume
57
To Adjust the Sound Volume
57
Mute
57
To Mute the Audio
57
Display
57
To Check the Settings
57
Digital Zoom
57
WIDE Operations
58
Wide Screen Operation (Manual
58
When Viewing Videos or Digital Video Discs
58
Wide Screen Operation with Computer Signals
59
SPLIT SCREEN Operations
60
Showing a Couple of Pictures on the Screen at the same Time
60
Operations in the Side-By-Side Mode
60
Adjusting the OSM Controls
61
Operations in the Picture-In-Picture Mode
61
Selecting the Input Signals to be Displayed
61
Zooming up Pictures
61
OSM (on Screen Menu) Controls
62
Menu Operations
62
Menu Tree
63
Picture Settings Menu
65
Adjusting the Picture
65
Reducing Noise in the Picture
65
Storing Picture Settings
65
Adjusting the Color to the Desired Level
66
Changing the Gamma Curve
66
Making the Low Tone Adjustments
66
Setting the Color Temperature
66
Adjusting the Colors
67
Adjusting the Pedestal Level (Black Level
67
Setting the Picture Mode According to the Brightness of the Room
67
Setting the Picture to Suit the Movie
67
Audio Settings Menu
68
Adjusting the Treble, Bass and Left/Right Balance and Audio Input Select
68
Setting the Allocation of the Audio Connectors
68
Image Adjust Settings Menu
68
Adjusting the Position, Size, Fine Picture, Picture Adj
68
SET up Settings Menu
69
Setting a Computer Image to the Correct RGB Select Screen
69
Setting High Definition Images to the Suitable Screen Size
69
Setting the BNC Connectors
69
Setting the Language for the Menus
69
Setting the RGB1 Connector
69
Setting the Signal and Black Level for DVI Signal
70
Setting the Video Signal Format
70
Resetting to the Default Values
71
Setting the Gray Level for the Sides of the Screen
71
Setting the Position of the Menu
71
Setting the Screen Size for S1/S2 Video Input
71
Turning On/Off the Menu Display
71
Function Settings Menu
72
POWER/STANDBY Indicator
72
Setting the Input Skip
72
Setting the Power Management for Computer Images
72
Signal
72
Displaying Still Images in the Sub Screen
73
Displaying the Entire Image During DIGITAL ZOOM Operations
73
Reducing Burn-In of the Screen
73
Signal Information Menu
75
Checking the Frequencies, Polarities of Input Signals, and Resolution
75
Pin Assignments
76
External Control
76
Application
76
Connections
76
Type of Connector: D-Sub 9-Pin Male
76
Communication Parameters
76
External Control Codes (Reference
76
Mini D-Sub 15-Pin Connector (Analog
76
DVI-D 24-Pin Connector (Digital
76
Troubleshooting
77
Plasma Monitor Power Cord/Manuals (Model Information and Operation) Safety Metal Fittings
85
Manuals (Model Information and Operation) Safety Metal Fittings
85
Plasma Monitor Power Cord
85
Installation
86
(Optional). Fasten the Safety Fittings to the Holes in the Back of the Monitor Using the Safety Fitting Mount Screws
86
How to Use the Safety Metal Fittings and the Screws for Safety Metal Fittings
86
Tipping Due to External Shock When Using the Stand
86
Ventilation Requirements for Enclosure Mounting
86
Cable Management
87
How to Use the Remote Control
87
Battery Installation and Replacement
87
Handling the Remote Control
87
Operating Range
87
Part Names and Function
88
Front View
88
Rear View/ Terminal Board
89
Remote Control
90
Basic Operations
91
Power
91
To Turn the Unit on and off
91
Volume
91
To Adjust the Sound Volume
91
Mute
91
To Mute the Audio
91
Display
91
To Check the Settings
91
Digital Zoom
91
WIDE Operations
92
Wide Screen Operation (Manual
92
When Viewing Videos or Digital Video Discs
92
Wide Screen Operation with Computer Signals
93
SPLIT SCREEN Operations
94
Showing a Couple of Pictures on the Screen at the same Time
94
Operations in the Side-By-Side Mode
94
Adjusting the OSM Controls
95
Operations in the Picture-In-Picture Mode
95
Selecting the Input Signals to be Displayed
95
Zooming up Pictures
95
OSM (on Screen Menu) Controls
96
Menu Operations
96
Menu Tree
97
Main Menu
98
Sub Menu
98
Picture Settings Menu
99
Adjusting the Picture
99
Reducing Noise in the Picture
99
Storing Picture Settings
99
Picture Memory
99
Adjusting the Color to the Desired Level
100
Bias Green
100
Bias Red
100
Changing the Gamma Curve
100
Gain Blue
100
Gain Green
100
Gain Red
100
Making the Low Tone Adjustments
100
Setting the Color Temperature
100
White Balance
100
Adjusting the Colors
101
Adjusting the Pedestal Level (Black Level
101
Color Tune Red Yes
101
Reset off on Yes
101
Setting the Picture Mode According to the Brightness of the Room
101
Setting the Picture to Suit the Movie
101
Adjusting the Position, Size, Fine Picture, Picture Adj
102
Adjusting the Treble, Bass and Left/Right Balance and Audio Input Select
102
Audio Input1
102
Audio Settings Menu
102
Bass 0 13
102
Image Adjust Settings Menu
102
Setting the Allocation of the Audio Connectors
102
Treble 0 13
102
Image Adjust
102
V-Position -64 0 +64
102
SET up Settings Menu
103
Setting a Computer Image to the Correct RGB Select Screen
103
Setting High Definition Images to the Suitable Screen Size
103
Setting the BNC Connectors
103
Setting the Language for the Menus
103
Setting the RGB1 Connector
103
Set up
103
Bnc Input
103
Color System
103
DVI Set up
103
Setting the Background Color When no Signal Is
104
Setting the Signal and Black Level for DVI Signal
104
Setting the Video Signal Format
104
All Reset
105
Display Osm on off Yes
105
Osm Adj
105
Resetting to the Default Values
105
Setting the Gray Level for the Sides of the Screen
105
Setting the Position of the Menu
105
Setting the Screen Size for S1/S2 Video Input
105
Turning On/Off the Menu Display
105
Function Settings Menu
106
POWER/STANDBY Indicator
106
Setting the Input Skip
106
Setting the Power Management for Computer Images
106
Signal
106
Displaying Still Images in the Sub Screen
107
Displaying the Entire Image During DIGITAL ZOOM Operations
107
Reducing Burn-In of the Screen
107
Signal Information Menu
109
Checking the Frequencies, Polarities of Input Signals, and Resolution
109
Pin Assignments
110
Application
110
Connections
110
Type of Connector: D-Sub 9-Pin Male
110
Communication Parameters
110
External Control Codes (Reference
110
Mini D-Sub 15-Pin Connector (Analog
110
DVI-D 24-Pin Connector (Digital
110
Troubleshooting
111
Advertisement
NEC 50XR4 Operation Manual (36 pages)
NEC Enhanced split screen Model Operation Manual
Brand:
NEC
| Category:
Flat Panel TV
| Size: 0.46 MB
Table of Contents
Operation Manual
1
Important Information
2
Table of Contents
5
Installation
6
Ventilation Requirements for Enclosure Mounting
6
How to Use the Safety Metal Fittings and the Screws for Safety Metal Fittings
6
Cable Management
7
How to Use the Remote Control
7
Battery Installation and Replacement
7
Operating Range
7
Handling the Remote Control
7
Part Names and Function
8
Front View
8
Rear View/ Terminal Board
9
Remote Control
10
Basic Operations
11
Power
11
To Turn the Unit on and off
11
Volume
11
To Adjust the Sound Volume
11
Mute
11
To Mute the Audio
11
Display
11
To Check the Settings
11
Digital Zoom
11
WIDE Operations
12
Wide Screen Operation (Manual)
12
When Viewing Videos or Digital Video Discs
12
Wide Screen Operation with Computer Signals
13
SPLIT SCREEN Operations
14
Showing a Couple of Pictures on the Screen at the same Time
14
Operations in the Side-By-Side Mode
14
Operations in the Picture-In-Picture Mode
15
Selecting the Input Signals to be Displayed
15
Zooming up Pictures
15
Adjusting the OSM Controls
15
OSM (on Screen Menu) Controls
16
Menu Operations
16
Menu Tree
17
Picture Settings Menu
19
Storing Picture Settings
19
Adjusting the Picture
19
Reducing Noise in the Picture
19
Setting the Color Temperature
20
Adjusting the Color to the Desired Level
20
Changing the Gamma Curve
20
Making the Low Tone Adjustments
20
Adjusting the Pedestal Level (Black Level)
21
Adjusting the Colors
21
Setting the Picture to Suit the Movie
21
Setting the Picture Mode According to the Brightness of the Room
21
Audio Settings Menu
22
Adjusting the Treble, Bass and Left/Right Balance and Audio Input Select
22
Setting the Allocation of the Audio Connectors
22
Image Adjust Settings Menu
22
Adjusting the Position, Size, Fine Picture, Picture Adj
22
SET up Settings Menu
23
Setting the Language for the Menus
23
Setting the BNC Connectors
23
Checking the Signal Being Transmitted to RGB1 Terminal
23
Setting High Definition Images to the Suitable Screen Size
23
Setting a Computer Image to the Correct RGB Select Screen
23
Setting the Signal and Black Level for DVI Signal
24
Setting the Video Signal Format
24
Setting the Background Color When no Signal Is Being Input
24
Setting the Gray Level for the Sides of the Screen
25
Setting the Screen Size for S1/S2 Video Input
25
Turning On/Off the Menu Display
25
Setting the Position of the Menu
25
Resetting to the Default Values
25
Function Settings Menu
26
Setting the Power Management for Computer Images
26
POWER/STANDBY Indicator
26
Setting the Input Skip
26
Erasing the Sub Screen Image When There Is no Input Signal
26
Displaying the Entire Image During DIGITAL ZOOM Operations
27
Displaying Still Images in the Sub Screen
27
Reducing Burn-In of the Screen
27
Setting Closed Caption
29
Reducing the Brightness of Closed Caption
29
Signal Information Menu
29
Checking the Frequencies, Polarities of Input Signals, and Resolution
29
External Control
30
Application
30
Connections
30
Type of Connector: D-Sub 9-Pin Male
30
Communication Parameters
30
External Control Codes (Reference)
30
Pin Assignments
30
Mini D-Sub 15-Pin Connector (Analog)
30
DVI-D 24-Pin Connector (Digital)
30
Troubleshooting
31
Limited Warranty
35
NEC 50XR4 Supplementary Manual (28 pages)
Plasma
Brand:
NEC
| Category:
Monitor
| Size: 0.18 MB
Advertisement
NEC 50XR4 Installation Manual (10 pages)
50” Plasma Display
Brand:
NEC
| Category:
Monitor
| Size: 0.53 MB
Table of Contents
Table of Contents
1
Product Description and Notes
1
Product Description
1
Ventilation Requirements
2
Display Dimensions
3
Front, Top & Bottom
3
Rear, Left & Right Side
4
Display Dimensions W/Optional Speakers and Stand
5
Dimensions W/Optional Flat Wall Mount
6
Dimensions W/Optional Tilt Wall Mount
7
Dimensions W/Optional Ceiling Mount
8
Connections
9
Cable Connection
10
Control Codes
10
NEC 50XR4 Brochure (7 pages)
Brochure
Brand:
NEC
| Category:
Monitor
| Size: 5.06 MB
NEC 50XR4 Specifications (2 pages)
Showcase Series Home Entertainment Plasma Displays
Brand:
NEC
| Category:
Monitor
| Size: 0.36 MB
NEC 50XR4 Supplementary Manual (1 page)
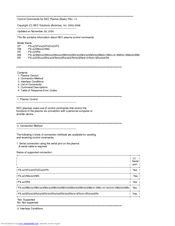
PC Control Connectors and Cables for NEC Plasma and Projectors
Brand:
NEC
| Category:
Cables and connectors
| Size: 0.02 MB
Advertisement
Related Products
NEC 50RESI
NEC PlasmaSync 50XR4A
NEC OPERATION 50-61RESI REV2S
NEC PlasmaSync 50XR6
NEC 50XR5
NEC 50XR5A
NEC 50XR4 INSTALLTION GUIDE V13
NEC 50XR5 INSTALLTION GUIDE V13
NEC PlasmaSync 50XC10
NEC PlasmaSync 50XM4
NEC Categories
Monitor
Projector
Server
Telephone
Computer Hardware
More NEC Manuals
Login
Sign In
OR
Sign in with Facebook
Sign in with Google
Upload manual
Upload from disk
Upload from URL