Sign In
Upload
Manuals
Brands
Dell Manuals
Firewall
9200
Dell 9200 Manuals
Manuals and User Guides for Dell 9200. We have
8
Dell 9200 manuals available for free PDF download: Installation And Service Manual, Owner's Manual, Service Manual, Getting Started Manual, Setup Manual
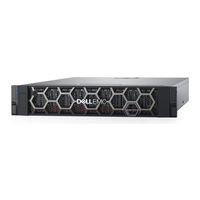
Dell 9200 Installation And Service Manual (202 pages)
Brand:
Dell
| Category:
Storage
| Size: 21.01 MB
Table of Contents
Table of Contents
3
Additional Resources
10
Chapter 1: Install a New Base Enclosure and an Optional Expansion Enclosure
11
Installation Power Overview
11
Install a New Base Enclosure
12
Choose Where to Install the Base Enclosure
12
Unpack the Base Enclosure
12
Install the Rails in the Cabinet
12
Install the Base Enclosure on the Rails
13
Cable the Base Enclosure Appliance to Switches
14
Connect Power Cables
14
Discover Your System
14
Upgrade Powerstore Software
15
Install a SAS Expansion Enclosure
15
Summary of Tasks for Installing an Expansion Enclosure
15
Verify Shipping Package Contents
15
Verify that You Received the Following
15
Component Quantity
15
Choose Where to Install the Expansion Enclosure
16
Removing a Filler Panel
16
Install the Rails in the Cabinet
17
Install the Expansion Enclosure on the Rails
18
Installing Drives
18
Installing the Front Bezel
19
Cable the Base Enclosure to the Expansion Enclosure
20
Connect SAS Expansion Enclosure Power Cables
21
Add a SAS Expansion Enclosure
21
Summary of Tasks for Adding an Expansion Enclosure
21
Verify Shipping Package Contents
22
Choose Where to Install the Expansion Enclosure
22
Removing a Filler Panel
23
Install the Rails in the Cabinet
23
Install the Expansion Enclosure on the Rails
24
Installing Drives
25
Installing the Front Bezel
25
Connect SAS Expansion Enclosure Power Cables
26
Cable the New SAS Expansion Enclosure
26
Expansion Enclosure
27
Install an Nvme Expansion Enclosure
28
Summary of Tasks for Installing an Expansion Enclosure
29
Verify Shipping Package Contents
29
Rail Kit, Including
29
Snap-In Rails
29
Screws (3 Per Rail)
29
Choose Where to Install the Expansion Enclosure
30
Removing a Filler Panel
30
Power Cords (2), Either
30
Black and Gray C13/C14
30
Bezel for Expansion Enclosure (with Key)
30
Installing the Nvme Expansion Enclosure Rails
31
Install the System in the Cabinet
33
Installing Cable Management Arms
34
Cable the Base Enclosure to the Nvme Expansion Enclosure
35
Closing the Cable Management Arms
37
Testing the Cable Management Arms
38
Installing Drives
38
Installing the Front Bezel
39
Add an Nvme Expansion Enclosure
40
Summary of Tasks for Adding an Expansion Enclosure
40
Verify Shipping Package Contents
40
Choose Where to Install the Expansion Enclosure
42
Removing a Filler Panel
42
Installing the Nvme Expansion Enclosure Rails
42
Install the System in the Cabinet
44
Installing Cable Management Arms
46
Cable the New Nvme Expansion Enclosure
47
Closing the Cable Management Arms
49
Testing the Cable Management Arms
50
Attach the Cables
50
Installing Drives
51
Installing the Front Bezel
51
Chapter 2: Base Enclosure Service Procedures
53
Replace a Faulted Drive in the Base Enclosure
53
Identify a Faulted Drive from Powerstore Manager
53
Remove a Faulted 2.5" Drive
53
Install a 2.5" Drive
54
Verify the Operation of a Replacement Drive
55
Return a Faulted Part
55
Add a New Drive to the Base Enclosure
56
Removing the Front Bezel
56
Remove a Drive Filler Module
56
Install a 2.5" Drive
57
Verify the Operation of an Added Drive
58
Replace an AC Power Supply
58
Identify a Faulted Power Supply from Powerstore Manager
59
Base Enclosure Power Supply Leds
59
Remove a Power Supply
59
Install a Power Supply
60
Verify the Operation of a Replacement Power Supply
61
Return a Faulted Part
61
Replace an Embedded Module
62
Before You Begin
62
Identify a Faulted Embedded Module from Powerstore Manager
62
Embedded Module Leds
62
Power down the Node
63
Remove a Faulted Embedded Module
63
Transfer the 4-Port Card
65
Install an Embedded Module
66
Power up the Node
67
Verify the Operation of a Replacement Embedded Module
67
Return a Faulted Part
68
Replace a 4-Port Card
68
Before You Begin
68
Identify a Faulted 4-Port Card from Powerstore Manager
68
Embedded Module Leds
69
Power down the Node
70
Remove an Embedded Module
70
Remove a 4-Port Card
71
Install a 4-Port Card
72
Install an Embedded Module
73
Power up the Node
74
Verify the Operation of a New 4-Port Card
74
Return a Faulted Part
74
Replace a 2-Port 100Gbe Card
75
Before You Begin
75
Identify a Faulted 2-Port 100Gbe Card from Powerstore Manager
75
Embedded Module Leds
75
Power down the Node
76
Remove an Embedded Module
76
Remove a 2-Port 100Gbe Card
77
Install a 2-Port 100Gbe Card
78
Install an Embedded Module
79
Power up the Node
80
Verify the Operation of a New 2-Port 100Gbe Card
80
Replace an SFP
81
Identify a Faulted SFP Module from Powerstore Manager
81
Remove an SFP Module
81
Install an SFP Module
81
Verify the Operation of a Replacement SFP Module
82
Return a Faulted Part
82
Replace an I/O Module
82
Before You Begin
83
Identify a Faulted I/O Module from Powerstore Manager
83
Base Enclosure I/O Module Leds
83
Power down the Node
83
Remove a Faulted I/O Module
84
Install an I/O Module
84
Power up the Node
85
Verify the Operation of a Replacement I/O Module
85
Return a Faulted Part
85
Replace a Fan Module
85
Before You Begin
86
Identify a Faulted Fan Module from Powerstore Manager
86
Power down the Node
86
Remove the Node
86
Remove the Top Cover from the Node
88
Remove the Fan Module
89
Install the Fan Module
90
Install the Top Cover on the Node
90
Install the Node
91
Verify the Operation of a Replacement Fan Module
92
Return a Faulted Part
93
Replace a Dual Inline Memory Module (DIMM)
93
Before You Begin
93
Identify a Faulted DIMM from Powerstore Manager
93
Power down the Node
93
Remove the Node
94
Remove the Top Cover from the Node
95
Remove the Faulted Dual Inline Memory Module
96
Install the Dual Inline Memory Module
97
Install the Top Cover on the Node
98
Install the Node
99
Verify the Operation of a Replacement DIMM
100
Return a Faulted Part
100
Replace an Internal M.2 Boot Module
101
Before You Begin
101
Identify a Faulted Internal M.2 Boot Module from Powerstore Manager
101
Power down the Node
101
Remove the Node
101
Remove the Top Cover from the Node
103
Remove the Faulted Internal M.2 Boot Module
104
Install the Internal M.2 Boot Module
105
Install the Top Cover on the Node
106
Install the Node
107
Verify the Operation of a Replacement Internal M.2 Boot Module
108
Return a Faulted Part
108
Replace an M.2 Boot Module Adaptor
109
Before You Begin
109
Identify a Faulted M.2 Boot Module Adaptor from Powerstore Manager
109
Power down the Node
109
Remove the Node
109
Remove the Top Cover from the Node
111
Remove the Faulted M.2 Boot Module Adaptor
112
Install the M.2 Boot Module Adaptor
113
Install the Top Cover on the Node
114
Install the Node
115
Verify the Operation of a Replacement M.2 Boot Module Adaptor
116
Return a Faulted Part
116
Replace a Node
117
Before You Begin
117
Identify a Faulted Node from Powerstore Manager
117
Power down the Node
117
Remove the Node
117
Remove the Top Cover from the Node
119
Transfer Parts from the Faulted Node to the Replacement Node
120
Install the Top Cover on the Node
120
Install the Node
121
Verify the Operation of a Replacement Node
122
Return a Faulted Part
123
Chapter 3: SAS Expansion Enclosure Service Procedures
124
Add a Drive in a SAS Expansion Enclosure
124
Removing the Front Bezel
124
Remove a Drive Filler Module
125
Installing a Drive
125
Installing the Front Bezel
126
Verify the Operation of an Added Drive
126
Replace a Faulted Drive in a SAS Expansion Enclosure
127
Identify a Faulted Drive from Powerstore Manager
127
Removing the Front Bezel
127
Remove a Faulted Drive
128
Installing a Drive
128
Installing the Front Bezel
129
Verify the Operation of a Replacement Drive
129
Return a Faulted Part
130
Replace a Link Control Card in a SAS Expansion Enclosure
130
Identify a Faulted LCC from Powerstore Manager
130
Removing a Faulted LCC
130
Installing a Replacement LCC
132
Verify the Operation of a Replacement LCC
134
Return a Faulted Part
134
Replace a Power/Cooling Module in a SAS Expansion Enclosure
135
Identify a Faulted Power/Cooling Module from Powerstore Manager
135
Removing a Faulted Power/Cooling Module
135
Installing a Replacement Power/Cooling Module
137
Verify the Operation of a Replacement Power/Cooling Module
139
Return a Faulted Part
139
Chapter 4: Nvme Expansion Enclosure Service Procedures
140
Add a Drive in an Nvme Expansion Enclosure
140
Removing the Front Bezel
140
Remove a Drive Filler Module
141
Installing a Drive
142
Installing the Front Bezel
142
Verify the Operation of an Added Drive
143
Replace a Faulted Drive in an Nvme Expansion Enclosure
143
Identify a Faulted Drive from Powerstore Manager
143
Removing the Front Bezel
144
Remove a Faulted Drive
144
Installing a Drive
145
Installing the Front Bezel
146
Verify the Operation of a Replacement Drive
146
Return a Faulted Part
146
Replace a Power Supply Module in an Nvme Expansion Enclosure
147
Identify a Faulted Power Supply from Powerstore Manager
147
Nvme Expansion Enclosure Power Supply Leds
147
Remove a Power Supply
148
Install a Power Supply
148
Verify the Operation of a Replacement Power Supply
149
Return a Faulted Part
149
Replace a Fan Module in an Nvme Expansion Enclosure
150
Identify a Faulted Fan Module from Powerstore Manager
150
Remove a Fan Module
150
Install a Fan Module
152
Verify the Operation of a Replacement Fan Module
154
Return a Faulted Part
154
Replace a Clock Distribution Board in an Nvme Expansion Enclosure
155
Identify a Faulted Clock Distribution Board from Powerstore Manager
155
Remove a Clock Distribution Board
155
Install a Clock Distribution Board
157
Verify the Operation of a Replacement Clock Distribution Board
159
Return a Faulted Part
159
Replace an Access Module in an Nvme Expansion Enclosure
160
Identify a Faulted Access Module from Powerstore Manager
160
Remove an Access Module
160
Install an Access Module
161
Verify the Operation of a Replacement Access Module
162
Return a Faulted Part
163
Replace a Data Interface Board in an Nvme Expansion Enclosure
163
Identify a Faulted DIB from Powerstore Manager
163
Removing a DIB
163
Replacing a DIB
165
Verify the Operation of a Replacement DIB
166
Return a Faulted Part
166
Replace a Dual Inline Memory Module (DIMM)
166
Before You Begin
166
Identify a Faulted DIMM from Powerstore Manager
166
Remove an Access Module
167
Remove the Faulted Dual Inline Memory Module
168
Install the Dual Inline Memory Module
169
Install an Access Module
169
Verify the Operation of a Replacement DIMM
170
Return a Faulted Part
171
Appendix A: Safety Precautions for Handling Replaceable Units
172
Handling Replaceable Units
172
Avoiding Electrostatic Discharge (ESD) Damage
172
Emergency Procedures (Without an Electrostatic Discharge Kit)
172
Hardware Acclimation Times
173
Removing, Installing, or Storing Replaceable Units
173
Unpacking a Part
174
Appendix B: Power Control Procedures
175
Power Control Procedure Considerations
175
Power Control Procedures Preview
176
Powering off Procedures for Powerstore Node
177
Power off a Powerstore T Model Node Using Powerstore Manager
177
Power off a Powerstore T Model Node Using a Service Script
177
Power off a Powerstore X Model Node
178
Powering on Procedures for Powerstore Node
179
Power on a Powerstore T Model Node Using a Service Script
179
Power on a Powerstore T Model Node by Reseating the Node
179
Power on a Powerstore X Model Node Using a Service Script
180
Power on a Powerstore X Model Node by Reseating the Node
180
Rebooting Procedures for a Powerstore Node
181
Reboot a Powerstore T Model Node Using Powerstore Manager
181
Reboot a Powerstore T Model Node Using a Service Script
181
Reboot a Powerstore X Model Node
182
Powering off Procedures for Powerstore Appliances
182
Power off a Powerstore T Model Appliance
183
Power off a Powerstore X Model Appliance
183
Powering on Procedures for Powerstore Appliances
184
Power on a Powerstore T Model Appliance
184
Power on a Powerstore X Model Appliance
185
Powering off Procedures for Powerstore Cluster
185
Power off a Powerstore T Model Cluster
186
Power off a Powerstore X Model Cluster
186
Powering on Procedures for Powerstore Cluster
187
Power on a Powerstore T Model Cluster
187
Power on a Powerstore X Model Cluster
188
Advertisement
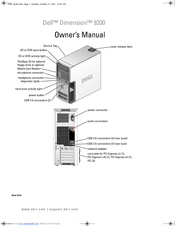
Dell 9200 Owner's Manual (174 pages)
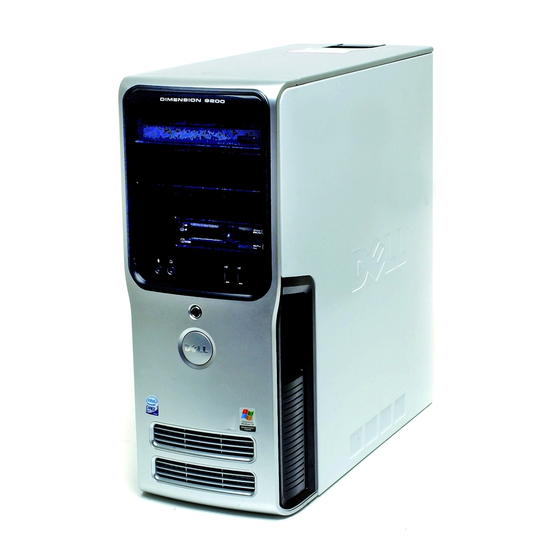
Dell Dimension 9200: Owners Manual
Brand:
Dell
| Category:
Desktop
| Size: 3.89 MB
Table of Contents
Table of Contents
3
Finding Information
9
1 Setting up and Using Your Computer
13
Front View of the Computer
13
Back View of the Computer
15
Back Panel Connectors
16
Connecting Monitors
17
Connecting Two Monitors with VGA Connectors
18
Connecting One Monitor with a VGA Connector and One Monitor with a DVI Connector
18
Connecting a Television (TV)
19
Changing the Display Settings
19
Setting up a Printer
20
Printer Cable
20
Connecting a USB Printer
20
Connecting to the Internet
21
Setting up Your Internet Connection
21
Setting up a Home and Office Network
22
Connecting to a Network Adapter
22
Network Setup Wizard
23
Transferring Information to a New Computer
23
Running the Files and Settings Transfer Wizard with the Operating System CD
24
Running the Files and Settings Transfer Wizard Without the Operating System CD
25
Playing Cds and Dvds
26
Playing a CD or DVD
26
Adjusting the Volume
28
Adjusting the Picture
28
Copying Cds and Dvds
28
How to Copy a CD or DVD
29
Using Blank Cds and Dvds
29
Helpful Tips
30
Using a Media Card Reader (Optional)
31
IEEE 1394 (Optional)
32
Power Management
32
Overview
32
Standby Mode
32
Hibernate Mode
33
Power Options Properties
33
Cleaning Your Computer
34
Cleaning the Computer, Keyboard, and Monitor
34
Cleaning the Mouse
35
Cleaning the Floppy Drive
35
Cleaning Cds and Dvds
35
2 Optimizing Performance
37
Hyper-Threading
37
About Your RAID Configuration
37
RAID Level 0 Configuration
38
RAID Level 1 Configuration
38
Configuring Your Computer for RAID
39
Using the Intel ® RAID Option ROM Utility
40
Using the Intel ® Application Accelerator
42
Dell Datasafe (Optional)
46
Intel ® VIIV™ Technology (Optional)
46
Using Intel ® VIIV™ Quick Resume Technology (QRT)
46
Enabling the QRT Feature in System Setup
47
Enabling the QRT Feature in the Operating System
47
3 Solving Problems
49
Troubleshooting Tips
49
Battery Problems
49
Drive Problems
50
CD and DVD Drive Problems
50
Hard Drive Problems
51
E-Mail, Modem, and Internet Problems
51
Error Messages
53
Media Card Reader Problems
54
Keyboard Problems
54
Lockups and Software Problems
55
The Computer Does Not Start up
55
The Computer Stops Responding
55
A Program Stops Responding
55
A Program Crashes Repeatedly
55
A Program Is Designed for an Earlier Windows Operating System
56
A Solid Blue Screen Appears
56
Other Software Problems
56
Memory Problems
57
Mouse Problems
57
Network Problems
58
Power Problems
59
Printer Problems
60
Scanner Problems
60
Sound and Speaker Problems
61
No Sound from Speakers
61
No Sound from Headphones
62
Video and Monitor Problems
62
The Screen Is Blank
62
The Screen Is Difficult to Read
63
4 Troubleshooting Tools
65
Diagnostic Lights
65
Dell Diagnostics
68
Dell Diagnostics Main Menu
69
Drivers
70
What Is a Driver
70
Identifying Drivers
70
Reinstalling Drivers
71
Resolving Software and Hardware Incompatibilities
72
Restoring Your Operating System
72
Using Microsoft Windows XP System Restore
72
Using Dell PC Restore by Symantec
74
5 Removing and Installing Parts
77
Before You Begin
77
Recommended Tools
77
Turning off Your Computer
77
Before Working Inside Your Computer
78
Removing the Computer Cover
78
Inside View of Your Computer
80
System Board Components
81
Memory
82
Memory Overview
82
Installing Memory
83
Removing Memory
85
Cards
86
PCI Cards
86
PCI Express Cards
91
Drive Panels
100
Removing the Drive Panel
100
Removing the Drive-Panel Insert
101
Replacing the Drive-Panel Insert
102
Replacing the Drive Panel
103
Drives
103
General Installation Guidelines
104
Hard Drive
104
Removing a Hard Drive
105
Installing a Hard Drive
106
Adding a Second Hard Drive
107
Floppy Drive
109
Removing a Floppy Drive
109
Installing a Floppy Drive
111
Media Card Reader
112
Removing a Media Card Reader
112
Installing a Media Card Reader
115
CD/DVD Drive
116
Removing a CD/DVD Drive
117
Installing a CD/DVD Drive
118
Battery
120
Replacing the Battery
120
Replacing the Computer Cover
121
Dell 9200 Owner's Manual (174 pages)
Dell Desktop Computer Owner's Manual
Brand:
Dell
| Category:
Desktop
| Size: 11.96 MB
Table of Contents
Table of Contents
3
Finding Information
9
1 Setting up and Using Your Computer
13
Front View of the Computer
13
Back View of the Computer
15
Back Panel Connectors
16
Connecting Monitors
17
Connecting Two Monitors with VGA Connectors
18
Connecting One Monitor with a VGA Connector and One Monitor with a DVI Connector
18
Connecting a Television (TV)
19
Changing the Display Settings
19
Setting up a Printer
20
Printer Cable
20
Connecting a USB Printer
20
Connecting to the Internet
21
Setting up Your Internet Connection
21
Setting up a Home and Office Network
22
Connecting to a Network Adapter
22
Network Setup Wizard
23
Transferring Information to a New Computer
23
Running the Files and Settings Transfer Wizard with the Operating System CD
24
Running the Files and Settings Transfer Wizard Without the Operating System CD
25
Playing Cds and Dvds
26
Playing a CD or DVD
26
Adjusting the Volume
28
Adjusting the Picture
28
Copying Cds and Dvds
28
How to Copy a CD or DVD
29
Using Blank Cds and Dvds
29
Helpful Tips
30
Using a Media Card Reader (Optional)
31
IEEE 1394 (Optional)
32
Power Management
32
Overview
32
Standby Mode
32
Hibernate Mode
33
Power Options Properties
33
Cleaning Your Computer
34
Cleaning the Computer, Keyboard, and Monitor
34
Cleaning the Mouse
35
Cleaning the Floppy Drive
35
Cleaning Cds and Dvds
35
2 Optimizing Performance
37
Hyper-Threading
37
About Your RAID Configuration
37
RAID Level 0 Configuration
38
RAID Level 1 Configuration
38
Configuring Your Computer for RAID
39
Using the Intel RAID Option ROM Utility
40
Using the Intel Application Accelerator
42
Dell Datasafe (Optional)
46
Intel® VIIV™ Technology (Optional)
46
Using Intel VIIV Quick Resume Technology (QRT)
46
Enabling the QRT Feature in System Setup
47
Enabling the QRT Feature in the Operating System
47
3 Solving Problems
49
Troubleshooting Tips
49
Battery Problems
49
Drive Problems
50
CD and DVD Drive Problems
50
Hard Drive Problems
51
E-Mail, Modem, and Internet Problems
51
Error Messages
53
Media Card Reader Problems
54
Keyboard Problems
54
Lockups and Software Problems
55
The Computer Does Not Start up
55
The Computer Stops Responding
55
A Program Stops Responding
55
A Program Crashes Repeatedly
55
A Program Is Designed for an Earlier Windows Operating System
56
A Solid Blue Screen Appears
56
Other Software Problems
56
Memory Problems
57
Mouse Problems
57
Network Problems
58
Power Problems
59
Printer Problems
60
Scanner Problems
60
Sound and Speaker Problems
61
No Sound from Speakers
61
No Sound from Headphones
62
Video and Monitor Problems
62
The Screen Is Blank
62
The Screen Is Difficult to Read
63
4 Troubleshooting Tools
65
Diagnostic Lights
65
Dell Diagnostics
68
Dell Diagnostics Main Menu
69
Drivers
70
What Is a Driver
70
Identifying Drivers
70
Reinstalling Drivers
71
Resolving Software and Hardware Incompatibilities
72
Restoring Your Operating System
72
Using Microsoft Windows XP System Restore
72
Using Dell PC Restore by Symantec
74
5 Removing and Installing Parts
77
Before You Begin
77
Recommended Tools
77
Turning off Your Computer
77
Before Working Inside Your Computer
78
Removing the Computer Cover
78
Inside View of Your Computer
80
System Board Components
81
Memory
82
Memory Overview
82
Installing Memory
83
Removing Memory
85
Cards
86
PCI Cards
86
PCI Express Cards
91
Drive Panels
100
Removing the Drive Panel
100
Removing the Drive-Panel Insert
101
Replacing the Drive-Panel Insert
102
Replacing the Drive Panel
103
Drives
103
General Installation Guidelines
104
Hard Drive
104
Removing a Hard Drive
105
Installing a Hard Drive
106
Adding a Second Hard Drive
107
Floppy Drive
109
Removing a Floppy Drive
109
Installing a Floppy Drive
111
Media Card Reader
112
Removing a Media Card Reader
112
Installing a Media Card Reader
115
CD/DVD Drive
116
Removing a CD/DVD Drive
117
Installing a CD/DVD Drive
118
Battery
120
Replacing the Battery
120
Replacing the Computer Cover
121
Advertisement
Dell 9200 Owner's Manual (122 pages)
Dell Inspiron 9200: Owners Manual
Brand:
Dell
| Category:
Laptop
| Size: 7.54 MB
Table of Contents
Table of Contents
3
Finding Information
9
1 A Tour of Your Computer
11
Front View
11
Left Side View
15
Right Side View
16
Back View
17
Bottom View
20
2 Setting up Your Computer
21
Connecting to the Internet
21
Setting up Your Internet Connection
21
Setting up a Printer
22
Printer Cable
22
Connecting a USB Printer
22
Power Protection Devices
23
Surge Protectors
23
Line Conditioners
24
Uninterruptible Power Supplies
24
3 Using a Battery
25
Battery Performance
25
Checking the Battery Charge
26
Dell Quickset Battery Meter
26
Microsoft Windows Power Meter
26
Charge Gauge
26
Low-Battery Warning
27
Charging the Battery
27
Removing a Battery
27
Installing a Battery
28
Storing a Battery
28
4 Using CD, Dvds, and Other Multimedia
29
Using Cds and Dvds
29
Copying Cds and Dvds
29
How to Copy a CD or DVD
29
Using Blank CD-Rs and CD-Rws
30
Helpful Tips
30
Connecting Your Computer to a TV or Audio Device
31
S-Video Connection
31
Composite Video Connection
32
Enabling the Display Settings for a TV
34
5 Using the Keyboard and Touch Pad
35
Numeric Keypad
35
Key Combinations
36
System Functions
36
Battery
36
CD or DVD Tray
36
Display Functions
36
Radios (Including Wireless Networking and an Internal Card with Bluetooth ® Wireless Technology)
36
Power Management
37
Speaker Functions
37
Microsoft ® Windows ® Logo Key Functions
37
Touch Pad
38
Customizing the Touch Pad
38
6 Using PC Cards
39
PC Card Types
39
PC Card Blanks
39
Extended PC Cards
39
Installing a PC Card
39
Removing a PC Card or Blank
41
7 Setting up a Home and Office Network
43
Connecting to a Network Adapter
43
Network Setup Wizard
44
Connecting to a Wireless Local Area Network
44
Determining Your Network Type
44
Connecting to a Wireless Network in Microsoft ® Windows ® XP
45
8 Solving Problems
47
Dell Diagnostics
47
When to Use the Dell Diagnostics
47
Drive Problems
49
DVD Drive Problems
50
Hard Drive Problems
51
E-Mail, Modem, and Internet Problems
51
Error Messages
53
IEEE 1394 Device Problems
54
Keyboard Problems
54
External Keyboard Problems
55
Unexpected Characters
55
Lockups and Software Problems
56
The Computer Does Not Start up
56
The Computer Stops Responding
56
A Program Stops Responding
56
A Program Crashes Repeatedly
56
A Program Is Designed for an Earlier Windows Operating System
57
A Solid Blue Screen Appears
57
Other Software Problems
57
Memory Problems
58
Network Problems
58
PC Card Problems
59
Power Problems
59
Printer Problems
61
Scanner Problems
61
Sound and Speaker Problems
62
No Sound from Integrated Speakers
62
No Sound from External Speakers
62
No Sound from Headphones
63
Touch Pad or Mouse Problems
63
Video and Display Problems
64
If the Display Is Blank
64
If the Display Is Difficult to Read
65
If Only Part of the Display Is Readable
65
Drivers
66
What Is a Driver
66
Identifying Drivers
66
Reinstalling Drivers
66
Restoring Your Operating System
67
Using Microsoft Windows XP System Restore
68
Using Dell PC Restore by Symantec
69
Resolving Software and Hardware Incompatibilities
70
9 Adding and Replacing Parts
71
Before You Begin
71
Recommended Tools
71
Turning off Your Computer
71
Before Working Inside Your Computer
72
Hard Drive
73
Returning a Hard Drive to Dell
75
Memory
75
Modem
79
Mini PCI Card
81
Hinge Cover
83
Keyboard
84
Coin-Cell Battery
85
Display
86
Optical Drive
88
Internal Card with Bluetooth ® Wireless Technology
89
Dell 9200 Service Manual (116 pages)
Brand:
Dell
| Category:
Desktop
| Size: 4.95 MB
Table of Contents
Before You Begin
1
Getting Started
1
Recommended Tools
1
Turning off Your Computer
1
Before Working Inside Your Computer
2
About Your Computer
3
Front View of the Computer
3
Back View of the Computer
5
Back Panel Connectors
6
Technical Overview
10
Inside View of Your Computer
10
System Board Components
11
Power Supply DC Connector Pin Assignments
13
DC Power Connector P1
14
DC Power Connector P2
15
DC Power Connector P7
16
Specifications
19
Advanced Troubleshooting
26
Power Lights
26
Diagnostic Lights
27
Beep Codes
29
Dell Diagnostics
32
Dell Diagnostics Main Menu
33
Identifying Drivers
34
Reinstalling Drivers
34
Using Windows Xp Device Driver Rollback
34
Manually Reinstalling Drivers
35
Resolving Software and Hardware Incompatibilities
35
System Setup Program
37
Entering System Setup
38
System Setup Screens
38
System Setup Options
39
Boot Sequence
42
Option Settings
42
Changing Boot Sequence for the Current Boot
43
Changing Boot Sequence for Future Boots
44
Clearing Forgotten Passwords
44
Clearing CMOS Settings
46
Flashing the BIOS
46
Removing and Installing Parts
48
Removing the Computer Cover
49
Memory Overview
53
Addressing Memory with 4-GB Configurations
54
Installing Memory
55
Removing Memory
57
Installing a PCI Card
58
Removing a PCI Card
62
Installing a PCI Express Card
63
Removing a PCI Express Card
68
Drive Panels
70
Removing the Drive Panel
71
Removing the Drive-Panel Insert
72
Installing the Drive Panel
73
General Installation Guidelines
75
Removing a Hard Drive
76
Installing a Hard Drive
77
Adding a Second Hard Drive
79
Floppy Drive
81
Removing a Floppy Drive
82
Installing a Floppy Drive
83
Removing a Media Card Reader
84
Installing a Media Card Reader
86
CD/DVD Drive
88
Removing a CD/DVD Drive
89
Installing a CD/DVD Drive
90
Replacing the Battery
92
Removing the Power Supply
94
Installing the Power Supply
95
Removing the Processor
96
Installing the Processor
99
I/O-Panel Components
102
Removing the I/O Panel
103
Installing the I/O Panel
107
Processor Fan
107
Removing the Processor Fan
108
Installing the Processor Fan
110
Dell 9200 Service Manual (56 pages)
Brand:
Dell
| Category:
Laptop
| Size: 2.16 MB
Table of Contents
Removing the Hard Drive
2
Replacing the Hard Drive
2
Returning a Hard Drive to Dell
3
Removing the Microprocessor Thermal-Cooling Assembly
6
Replacing the Microprocessor Thermal-Cooling Assembly
6
Removing the Microprocessor Module
8
Replacing the Microprocessor Module
9
Removing the System Board
10
Replacing the System Board
11
Removing the USB Port Board
13
Replacing the USB Port Board
13
Removing the Battery Latch Assembly
15
Replacing the Battery Latch Assembly
16
Removing the Speakers
17
Replacing the Speakers
17
Removing the Subwoofer
19
Replacing the Subwoofer
19
Flashing the BIOS
21
Pin Assignments for I/O Connectors
22
USB Connector
22
S-Video TV-Out Connector
22
Video Connector
22
IEEE 1394 Connector
23
Before You Begin
24
Recommended Tools
24
Turning off Your Computer
24
Before Working Inside Your Computer
24
Computer Orientation
25
Screw Identification
26
Internal Card with Bluetooth® Wireless Technology
28
Removing the Hinge Cover
29
Replacing the Hinge Cover
29
Removing the Keyboard
30
Replacing the Keyboard
31
Removing the Mini PCI Card
32
Replacing the Mini PCI Card
33
Removing the Coin-Cell Battery
35
Replacing the Coin-Cell Battery
35
Removing the Palm Rest
37
Replacing the Palm Rest
38
System Components
40
Memory Module
42
Removing the Memory Module
42
Replacing the Memory Module
43
Removing the Modem
44
Optical Drive
45
Replacing the Modem
45
Removing the Optical Drive
45
Replacing the Optical Drive
46
Display Assembly
47
Removing the Display Assembly
47
Replacing the Display Assembly
48
Display Bezel
49
Removing the Display Bezel
50
Display Panel
51
Replacing the Display Bezel
51
Removing the Display Panel
51
Display Latch
52
Dell 9200 Getting Started Manual (65 pages)
SonicWALL SuperMassive Appliances
Brand:
Dell
| Category:
Firewall
| Size: 2.2 MB
Table of Contents
In this Guide
3
Chapter 1 Sections Include
3
Table of Contents
3
In this Guide
3
Additional Information
4
Supermassive 9200 Package Contents
7
The Front Panel
8
The Back Panel
9
Using this Getting Started Guide
10
Chapter 2 Determining the WAN Type
13
System Requirements
13
Recording Configuration Information
14
Initial Setup
15
Using the Setup Wizard
17
Testing Your Internet Connection
18
Internet Access
19
Troubleshooting Your Connections
20
Chapter 3 Registering, Licensing, and Upgrading
22
Using Mysonicwall
23
Creating a Mysonicwall Account
23
Registration Overview
24
Registering in Sonicos
24
Alternative Registration Options
25
Licensing Security Services
26
Security Services and Software
26
Activating & Managing Licenses Using Mysonicwall
27
Upgrading Firmware
28
Upgrading the Firmware
29
Chapter 4 Deployment Scenarios
32
Advanced Deployment Scenarios
33
Configuring NAT Mode Gateway
37
Configuring a Stateful HA Pair
38
Configuring L2 Bridge Mode
44
Support and Training Options 5 in this Section
46
Support and Training Options
46
Customer Support
47
Knowledge Portal
47
Training
48
User Forums
48
Additionally Supported Languages
49
Rack Mounting Instructions
52
Product Safety and Regulatory Information
58
Related Documentation
49
Dell 9200 Setup Manual (2 pages)
Dell XPS 410: Quick Start
Brand:
Dell
| Category:
Desktop
| Size: 5.4 MB
Advertisement
Related Products
Dell SuperMassive 9800
Dell 922 - Photo All-in-One Printer 922
Dell Dimension 9200C
Dell 924 - Photo All-In-One Inkjet
Dell 928
Dell 922 All In One Photo Printer
Dell 928 All In One Inkjet Printer
Dell 926 All In One Inkjet Printer
Dell 926
Dell Latitude 9510
Dell Categories
Laptop
Desktop
Server
Monitor
Storage
More Dell Manuals
Login
Sign In
OR
Sign in with Facebook
Sign in with Google
Upload manual
Upload from disk
Upload from URL